Articles
How to Lay Limestone Pavers
19.08.24
Step-by-Step Guide on How to Lay Limestone Pavers
So, you've decided to enhance your outdoor space with limestone pavers—great choice!
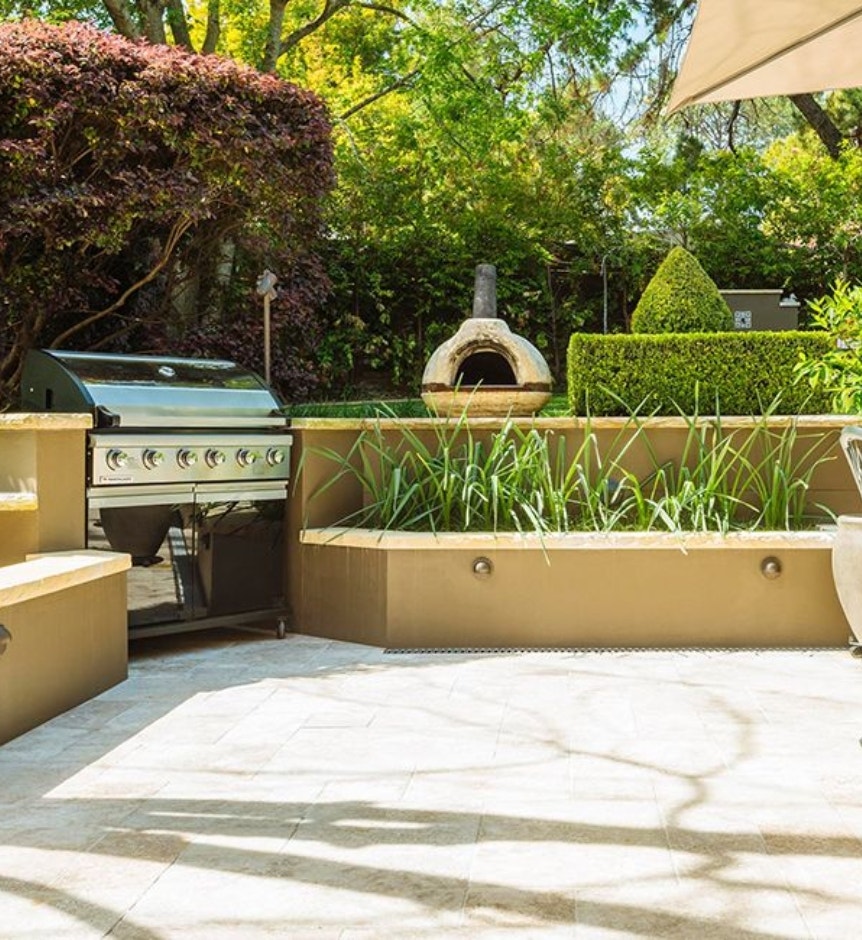
Limestone pavers can transform your outdoor area into a stylish, functional space, whether it's a cosy patio, charming garden path, or sturdy driveway.
In this guide, we'll walk you through each step, from planning and installing to the final touches. By the end, you'll know how to lay limestone pavers to tackle this rewarding DIY project.
Ready to start? Let's dive in and transform your outdoor space with beautiful limestone pavers!
Tools and Materials Needed
Before you start laying those limestone pavers, it's good to have everything ready to make the process smoother and easier.
Here’s a comprehensive list of what you’ll need:
Tools:
- Shovel
- Level
- Rubber mallet
- Measuring tape
- Rake
- String line and stakes
- Plate compactor
- Straightedge
- Masonry saw or angle grinder
- Chisel
- Hammer
- Safety gear
Materials:
- Limestone pavers
- Gravel
- Base sand
- Edge restraints (metal, plastic, or stone)
- Spacers
- Polymeric sand or grout
- Paver Sealer (optional)
With all these tools and materials ready, you can roll up your sleeves and get to work!
Step 1 - Planning and Measuring the Area
Proper planning helps you dodge mistakes and gives you a clear project roadmap. It's a time, money, and effort saver.
Start by measuring the area you want to pave:
- Use stakes and string to outline the area for the pavers
- Measure the length and width
- Multiply length by width
- Verify measurements for accuracy
Proper drainage:
- Ensure the area slopes away from structures
- Use gravel to reduce water damage and erosion
Don’t forget to install edging around the border before paving. This will define the borders and hold the pavers in place once they are laid.
Step 2 - Preparing the Ground
Now that you have your plan in place, it's time to get your hands dirty. Proper ground preparation is crucial for ensuring your limestone pavers sit correctly and stand the test of time.
Here’s how to get your site ready:
Clear:
- Clear the area of any rocks, sticks, and other debris.
- Remove all vegetation, including grass and weeds, to prevent future growth under your pavers.
Excavate:
- Use a shovel to excavate the area to a depth that will accommodate the base layers and the thickness of your pavers. Typically, this is around 15-20 cm.
- Remove the excavated soil from the site or repurpose it elsewhere in your garden.
Compact:
- Smooth the excavated area with a rake to create an even surface.
- Press the soil firmly with a plate compactor to ensure it is stable and ready for the base layers.
Step 3 - Laying the Base
Alright, you’ve done the groundwork. Now, it's time to create the base for your limestone pavers. The more solid it is, the better your pavers will look and perform.
To lay the base:
- Pour a 10-15 cm layer of gravel evenly across the excavated area.
- Use a rake to distribute the gravel uniformly.
- Use a plate compactor to press the gravel into a firm, stable base.
- If the gravel layer is thick, compact it in 5 cm stages until you reach the desired depth.
- Ensure the compacted gravel base is even using a level.
- Add a 2-3 cm layer of sand over the compacted gravel.
- Distribute the sand evenly with a rake and smooth it with a straightedge.
- Confirm the sand layer is level and adjust as needed.
And there you have it: your foundation is now ready to support the weight of your limestone pavers.
Step 4 - Placing the Limestone Pavers
Now comes the fun part – laying down your beautiful limestone pavers.
Follow these steps for a professional finish:
- Choose a starting point: Begin laying pavers from a corner or the longest straight edge. This helps keep your pattern aligned.
- Set the first paver: Place the first paver carefully, ensuring it’s properly positioned, as it will guide the rest of the installation.
- Follow your design: Lay the pavers according to your planned pattern, whether it’s a simple grid or a more intricate design.
- Maintain even gaps: Use spacers to maintain consistent gaps between pavers for a uniform look.
- Check alignment: Periodically check the alignment of the pavers to ensure they stay true to your design.
- Check level: Use a level to ensure each paver is even as you lay it. Adjust by adding or removing sand underneath.
- Adjust: If needed, tap the pavers gently with a rubber mallet to set them in place and ensure they are level.
Take your time with each paver, making sure they're lined up and level. That way, you'll end up with a polished, professional look.
Step 5 - Cutting and Fitting Pavers
To get that perfect fit, you'll need to cut some pavers for the edges and corners.
Here’s how to make the cuts:
- Measure and mark the pavers where they need to be cut. Use a straightedge and draw a clear line.
- To cut, use a masonry saw or angle grinder. Hold the tool steady and cut slowly to maintain control and accuracy.
- For minor adjustments, a chisel and hammer will do the job.
Always wear safety glasses, gloves, and a dust mask to protect yourself from debris and dust and follow the manufacturer’s safety guidelines for the tools you’re using.
Step 6 - Filling the Joints
If you've made it this far, congrats! Let’s talk about the finishing touch that holds it all together, filling the joints.
Follow these steps to do it effectively:
- Use polymeric sand for a durable, weed-resistant finish or grout for a more permanent solution.
- Pour the sand over the pavers, ensuring it gets into all the joints. For grout, follow the manufacturer’s instructions.
- Use a broom to sweep the sand into the joints, ensuring even distribution.
- If using polymeric sand, lightly spray the area with water to activate its binding properties. For grout, ensure it fills the joints completely and smooths out the surface.
- Add more filler and compact until the joints are completely filled.
Tips for maintaining even joints:
- Regular Maintenance: Periodically check and refill joints to keep them even and prevent shifting.
- Avoid Over-Watering: When using polymeric sand, avoid excessive watering, which can wash it away.
- Seal the Joints: Consider sealing the joints to protect them from weather and wear.
Step 7 - Finalising the Installation
You're almost there! A few final considerations remain before you can sit back and admire your handiwork.
- Run the compactor over the entire area to ensure all pavers are firmly set.
- Ensure the surface remains even after compacting, making any necessary adjustments.
- Sweep away any remaining sand or grout from the surface.
- Use a hose to wash the pavers, removing any dust or debris gently.
- Ensure the slope and drainage systems are functioning correctly to prevent water pooling.
- Walk on the pavers to check for any movement or instability. Make adjustments as needed.
- Apply paver sealer for added protection and durability. Follow the manufacturer’s directions.
Follow these steps, and you'll have a durable, attractive paver installation in no time. With a little maintenance, your new outdoor space will look fantastic for years to come!
FAQs About How to Lay Limestone Pavers
What Do You Put Under Limestone Pavers?
Under limestone pavers, you typically lay a base consisting of a layer of compacted gravel followed by a layer of sand.
The gravel provides a stable foundation and ensures proper drainage, while the sand creates a smooth, even surface for the pavers. This combination helps prevent shifting and promotes longevity.
How Thick Should the Base Be for Limestone Pavers?
The base for limestone pavers should generally be about 15-20 cm thick. This includes a 10-15 cm layer of compacted gravel and a 2-3 cm layer of sand.
The base's thickness ensures stability and proper drainage and helps prevent the pavers from shifting over time.
Can I Lay Limestone Pavers on Concrete?
Yes, laying limestone paving on concrete is an option. To do this, ensure the concrete surface is clean, level, and in good condition. Apply a layer of mortar or adhesive specifically designed for stone pavers to bond the limestone to the concrete.
This method is often used for patios, driveways, and other areas where a solid, non-porous base is desired.
How Do I Prevent Weeds From Growing Between Limestone Pavers?
To prevent weeds from growing between limestone pavers, you have a few options:
- Lay a geotextile fabric under the gravel base to block weed growth.
- Use polymeric sand, which hardens and inhibits weed growth, to fill the joints between the pavers.
- Periodically inspect and refill joints and remove any weeds that may start to grow.
By taking these precautions, you can maintain a weed-free paver installation.
Transform Your Outdoor Space Today
Transforming your outdoor space with limestone pavers is a rewarding project that enhances your property's beauty and functionality. Ready to get started?
Here's a quick recap: Prepare the area and ground, lay the base, place and fit the pavers, fill the joints, and finalise the installation.
Need some guidance for your DIY project? Amber is here to help!
Let's make your outdoor space stunning together!
Book a free design consultation today or view our product options online to make your dream outdoor space a reality!


