DIY Advice
The Bathroom Remodel Process
10.04.24
7 Steps to Your Dream Space
Does your bathroom currently feel like a time capsule from the '80s? Yellow and green tiles, oversized cabinets taking up half the room, and a layout that doesn't make sense?
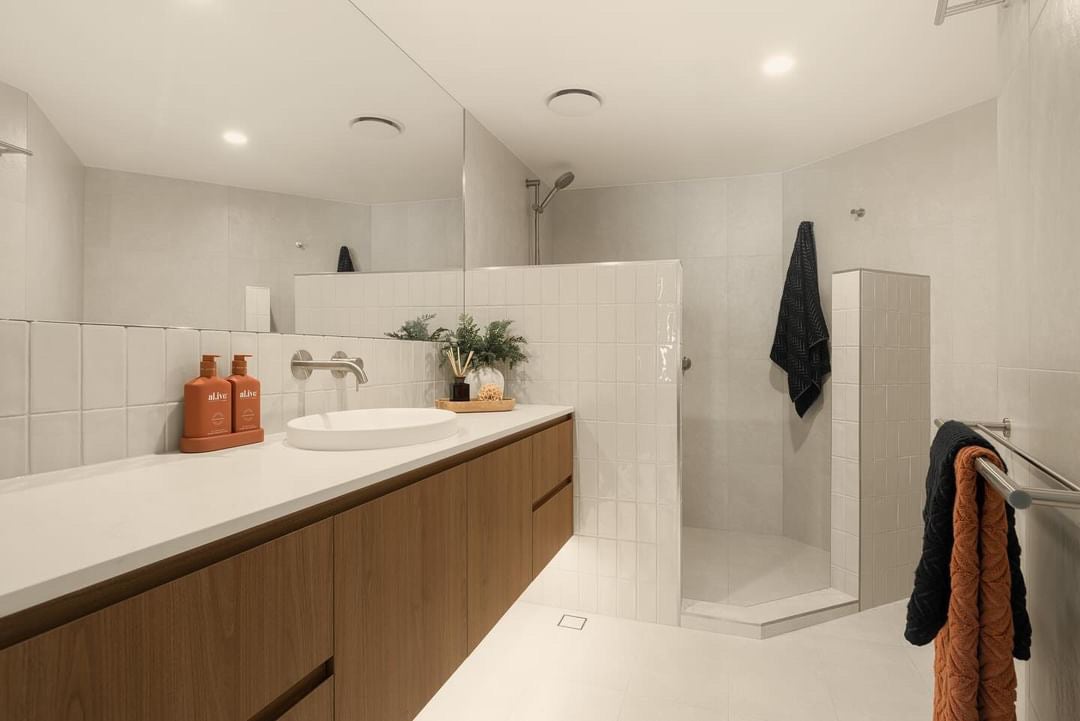
Imagine this instead: Stepping into a bathroom that feels like your personal spa, with soothing colours, natural stone accents, sleek fixtures, and a spacious, airy layout.
Sounds amazing, right? Guess what – you can absolutely have that dream bathroom!
All it takes is a well-planned remodel, beautiful materials, and a little help from your friends at Amber Tiles.
We're here to guide you through the bathroom remodel process in 7 simple steps!
Step 1: Planning and Design
Before diving headfirst into decisions, take a moment to gather inspiration for your bathroom remodel. What kind of vibe are you going for? Do you crave the clean lines and natural tones of a spa-like retreat?
Or are you looking for bold patterns and vibrant colours? Knowing your design direction from the start will make sure that every choice you make feels cohesive and reflects the style you want.
Even if your bathroom is on the smaller side, clever planning can create an open feel. Think vertically! Installing tall cabinets provides ample storage without sacrificing precious floor space.
Floating vanities create a sense of openness, making the room feel larger and airier. Think about how many people typically use the bathroom in the mornings and design the layout for smooth flow – especially during those hurried pre-work or school routines.
Step 2: Budgeting
Let's be honest, renovations don't come cheap. But with a realistic budget in place from the beginning, you can achieve the bathroom you love while staying on track financially.
Here's how to break it down:
- Get detailed quotes: Instead of relying just on averages, contact at least three contractors (plumbers, tilers, electricians) for detailed quotes based on your specific project. This gives you much more accurate numbers to work with.
- Factor in materials: Once you have inspiration for your bathroom design, start pricing out the specific materials you want (tiles, fixtures, etc.). Remember, prices vary greatly depending on style and quality.
- Add a buffer: Even with careful planning, surprises happen! Include a 10-20% contingency into your budget to handle the unexpected without blowing your entire plan.
Here's a general cost range to get you started (remember, these vary depending on your location, project size, and material choices):
- Tiles: $30 - $150+ per square meter
- Fixtures (taps, showerhead, vanity): $150 - $1000+
- Labour (plumbers, tilers, electricians): $60 - $120+ per hour
It's a good idea to leave some wiggle room in your budget for those special touches that make your bathroom really shine.
Maybe it's a statement tile that catches your eye or a freestanding tub that you fell in love with. Don't be afraid to save in some areas to splurge on the elements that mean the most to you!
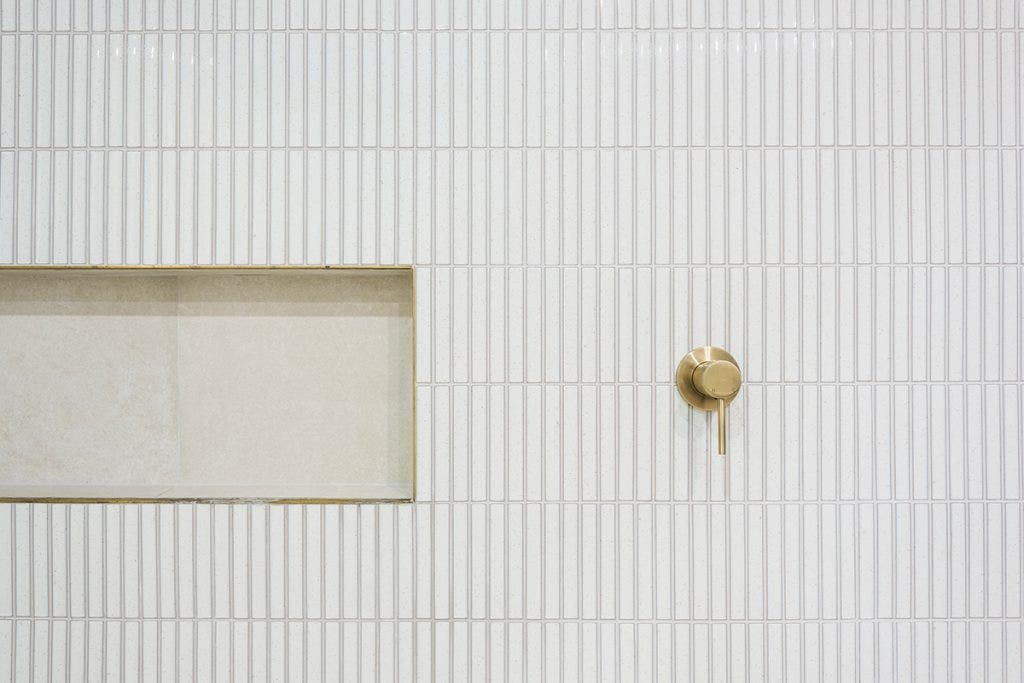
Step 3: Choosing Materials
Choosing bathroom materials is like picking the perfect outfit. You want it to be stunning, but it also needs to withstand everyday use.
- Don't skimp on durability: Your bathroom sees a lot of action – steamy showers, splashes on the floor, and heavy use of fixtures. Choose materials that are designed to withstand the rigours of daily life. Investing in quality now means less hassle and costly replacements down the road.
- The Amber advantage: This is where Amber really shines! Exploring countless options for tiles, vanities, accessories, and fixtures can get overwhelming. But our team is here to help you find materials that match your dream bathroom and make sure it'll look amazing for years to come. Book a design consultation to get your bathroom renovation started!
Step 4: Hiring Contractors
The right contractors make all the difference in terms of your renovation running smoothly. Finding someone skilled and reliable isn't always as easy as it sounds.
Here are a few tips:
- Get referrals: Tap into your network! Ask friends, family, and neighbours if they know any trusty tradesmen they have used in the past. Online Google reviews can also help!
- Licence check: It's really important to make sure all your contractors are fully licensed and insured. This protects you and makes sure the work meets safety standards.
- DIY or delegate?: If you're a hands-on kind of person, painting, simple fixture installations, and demolition are all doable with some research and the right preparation. But when it comes to major plumbing changes, electrical work, or changes to structural elements, it's wiser (and safer) to bring in the seasoned pros.
Step 5: Demolition and Installation
Demo day is where things get exciting! This is the first step towards saying goodbye to your outdated bathroom and hello to the new.
Be prepared for unexpected surprises lurking behind the walls—sometimes they're quick fixes, and other times, not so much! A little flexibility in your timeline helps in these situations.
Renovations have a natural rhythm to minimise errors and save time (and money!). In general, you'll expect to see:
- Demolition of the old bathroom (removal of all old bathroom ware, fixtures and possibly walls if needed)
- New plumbing rough-in (behind-the-walls/floor piping for water and sewerage)
- New electrical work
- Waterproofing of wet areas
- New tiling (walls and floors)
- Installation of new fixtures (tub, shower, vanity, toilet)
- Installation of lighting and finishing touches
Step 6: Detailing
Don't underestimate the power of those final details! This is where your bathroom transitions from "nice" to "absolutely stunning."
Grout matters: Choose a grout colour that complements your new tiles and resists bathroom mildew and stains. You don't want all your beautiful new tiles to be marred by discoloured nasty grout!
Focus on fixtures: You need to make sure your tapware, showerhead, handles and even toilet roll holders harmonise in style and finish. A cohesive look across all your fixtures really complements the overall design.
Accessorise with purpose: Gorgeous towels, a beautiful bathmat, cleverly placed storage, and the perfect mirror aren't afterthoughts. These elements complete the look and transform your bathroom into a functional and stylish space. But remember, sometimes less is more! Carefully placed items and a touch of empty space can really work. Amber's design stylists can help you find that perfect balance and show you how to create a cohesive look that feels both luxurious and personal.
Step 7: Final Inspection and Clean Up
Depending on the work involved, a final inspection by qualified professionals like a plumber, electrician, and/or general building inspector makes sure everything meets Australian standards and functions properly.
Make sure waste materials are disposed of responsibly. Renting a skip bin for the duration of the renovation is the easiest way to manage demolition debris and construction waste. Your contractors can often arrange this for you.
At the end of the work, you'll want to do a deep clean before your grand reveal to friends and family!
Then, it's time to break in that gorgeous new bathtub or shower with a relaxing soak. You've earned it!
<h2> Ready To Begin Your Bathroom Transformation? </h2>
Remember that cramped, outdated bathroom we talked about at the start? The one that made you sigh instead of smile? With careful planning, the right choices, and the right guidance, that old bathroom is gone!
If you're ready to turn your bathroom into a retreat, the next step is easy; visit your nearest Amber showroom! Our knowledgeable and passionate team will walk you through your bathroom renovation options and help you find the perfect combination of style and function.
Don't settle for a dull and outdated space - create a bathroom that makes you feel like royalty every time you step inside!
Don't hesitate to contact us today for help!
FAQs About a Bathroom Remodel Process
What Is the Correct Order To Remodel a Bathroom?
A typical bathroom remodel follows this order:
- Demolition
- Rough-in plumbing and electrical updates
- Tiling walls and floors
- Installation of fixtures (bathtub, shower, vanity, toilet)
- Lighting, painting, finishing details
What Do I Wish I Knew Before Remodelling My Bathroom?
Remodels often cost more and take longer than expected. Leave some room in your budget for surprises and adjust your timeline to avoid rushing towards the end of the work.
How Long Does It Take To Renovate a Bathroom?
A small bathroom refresh can take 2-3 weeks. A full gut renovation, especially in a larger bathroom, can take 4-6 weeks or more. Factors like material availability and unexpected issues can affect the timeline.